How to Add a Product (Business / ERP)
Every product a business sells - whether it's tracked in-store only or also listed on Core Market - starts here. This walks through adding one from MPAZI App's Products section.
 2
2
2
4
2
2
2
4
Open Products → Add Product
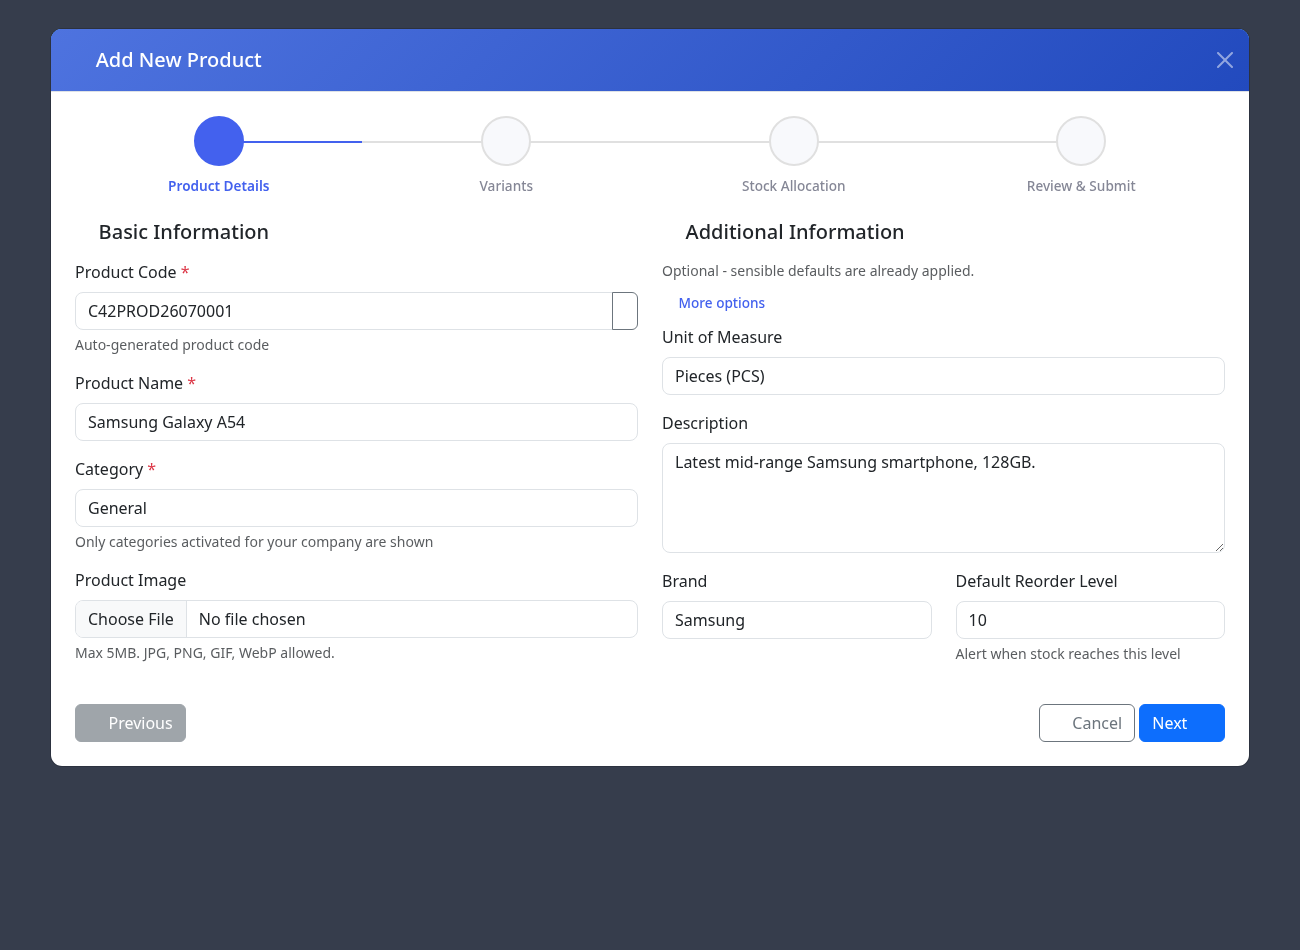
From the sidebar, go to Products, then click Add New Product. This opens a 4-step form: Product Details, Variants, Stock Allocation, and Review & Submit.
Fill in the basics
The product code is generated for you automatically. Enter a clear Product Name, pick a Category (only categories activated for your company will show up), and optionally upload a Product Image - JPEG, PNG, GIF, or WebP, up to 5MB.
Add optional details
Click More options to set a description, brand, unit of measure, and default reorder/max stock levels. These all have sensible defaults, so you can skip this if you're in a hurry.
Set up variants (optional)
If this product comes in different sizes, colors, or versions, add a variant for each on the next step - each variant gets its own SKU, price, and stock count. Leave this empty for a simple, single-version product.
Allocate stock and submit
Assign starting stock to a warehouse/location, review the summary, and submit. The product is now live in your inventory - and, if its category is enabled for the marketplace, visible on Core Market too.